Quick answer: To set up a home composting system, choose a well-drained location, build or buy a bin, stockpile dry carbon-rich materials (browns) and collect nitrogen-rich materials (greens). Begin with roughly two to three volumes of browns for each volume of greens, keep the contents as damp as a wrung-out sponge, mix occasionally for oxygen and cover each fresh food addition with browns. A managed backyard pile may produce finished compost in about three to five months, while an unattended one can take a year or longer, according to the U.S. Environmental Protection Agency.
A home composting system doesn’t need to be complicated, expensive or smelly. It is a simple way to turn vegetable peels, coffee grounds, dry leaves and garden trimmings into useful material for your soil. The difficult part is rarely the science. It is choosing a system that matches your space, maintaining the right mixture and knowing how to solve problems when the pile becomes wet, dry or attractive to pests.
This guide is designed around those practical choices. It covers an outdoor bin, a homemade wire enclosure, a three-bin system and an indoor worm bin. It also shows you how to measure the compost you’ll need rather than buying or making more than your garden can use. If you’re planning raised beds, GardenVoila’s compost calculator and soil calculator can help connect your compost supply with your actual garden dimensions.
What is a home composting system?
Composting is the managed aerobic breakdown of organic materials by microorganisms. Bacteria, fungi and many small soil animals help transform food scraps and yard materials into a dark, crumbly soil amendment. Unlike leaving waste in a sealed, airless container, healthy aerobic composting requires oxygen. The EPA’s overview of composting explains that the process depends on the balance of carbon, nitrogen, moisture, oxygen, particle size and pile structure.
Finished compost can improve soil structure and moisture retention, and slowly contribute nutrients. It isn’t a magical replacement for every fertilizer need, and it should not be treated as identical to garden soil. But it is a versatile soil amendment and a valuable way to reuse organic material at home.
The system itself can be as simple as an open pile in a yard, a wire-mesh cylinder, a lidded bin, a tumbler, several adjacent wooden bays or a worm bin indoors. No single method suits every household.
Choose the right composting method for your space
| Method | Best for | Benefits | Main trade-off |
| Open pile | Large yard with plenty of leaves | Low cost, easy expansion | Less tidy; harder to discourage animals |
| Wire-mesh or wooden bin | Most backyard gardeners | Economical, good airflow | Needs access for turning and harvesting |
| Enclosed plastic compost bin | Small or medium yard | Compact and tidy | Material can become wet or hard to mix |
| Compost tumbler | Patio or small yard | Easier to rotate, more contained | Limited capacity; batch management helps |
| Three-bin compost system | Garden with lots of seasonal waste | Separate fresh, active and finished material | Needs more ground space and building materials |
| Worm bin (vermicomposting) | Apartments, balconies, indoor spaces | Processes many fruit and vegetable scraps | Needs suitable worms, bedding and temperature care |
For most beginners with a yard: a simple, well-ventilated bin is a sensible starting point. For apartment dwellers: a properly managed worm bin or an organized community food-scrap collection program may be easier. For a household with large quantities of leaves and garden waste: a multi-bin system can make management and harvesting much simpler.
A countertop “food recycler” or dehydrator isn’t necessarily a composter. The EPA notes that some food-scrap appliances grind and dehydrate scraps without producing biologically stable finished compost. The processed material may still require a composting process afterward.
Step 1: choose a good composting location
Pick a place that is well drained, accessible through different seasons and close enough to the garden that you will use it. A location with room for a wheelbarrow or garden fork makes turning and harvesting much easier. Avoid placing the pile directly against a building or fence where retained moisture could cause damage or limit airflow.
Sun or shade can both work. A sunny spot may dry out faster, especially in hot climates; a heavily shaded spot may stay cooler and wetter. The key is having a reliable way to manage moisture and access. A nearby outdoor tap is convenient, but the pile shouldn’t sit in a low area that floods after rain.
If you live in a neighborhood with rodents or scavenging animals, an enclosed bin with a fitted lid and secure lower mesh may be more appropriate than an open pile. Local rules, landlord agreements or homeowners’ association requirements may also influence which composting system you choose.
Step 2: decide whether to build or buy a compost bin
A useful homemade bin can be made from a cylinder of sturdy wire mesh, untreated wood or suitable reused materials. Whatever you choose, provide airflow, reasonable access for adding material and a way to retrieve finished compost without completely dismantling the whole setup.

For a simple wire cylinder, form a stable ring, secure the overlapping ends and place it on a level, draining surface. For a wooden box or pallet-based bin, leave ventilation gaps and make one side removable or easy to open. Be cautious about wood treated with chemicals that could contaminate garden soil. Avoid sharp, exposed wires and unstable structures.
A pile around three feet in each direction often offers a practical balance of heat retention and ease of handling, although small household bins still work when managed more slowly. Very small piles often fail to heat up; very large piles can be difficult to turn safely and may compact in the center. The design should match your physical ability and available space.
If you’re buying a bin, prioritize ease of loading, drainage, airflow, durability and access to the finished material over sales claims about instant compost. Tumblers can be helpful, but simply rotating a bin doesn’t compensate for poor material balance or excessive moisture.
Use GardenVoila’s compost-bin-size calculator to estimate the capacity you need for garden trimmings and dry leaves before purchasing or building a system.
Step 3: collect your greens and browns
Microorganisms use carbon for energy and nitrogen to build and reproduce. In home composting, the carbon-rich inputs are traditionally called browns, and nitrogen-rich inputs are called greens. These are useful practical categories, not precise laboratory classifications.
| Greens (usually moist and nitrogen-rich) | Browns (usually dry and carbon-rich) |
| Fruit and vegetable scraps | Dry leaves |
| Fresh grass clippings | Shredded plain cardboard |
| Coffee grounds and paper filters | Torn uncoated brown paper |
| Fresh non-diseased plant clippings | Small twigs and straw |
| Many fresh soft weeds without seeds | Untreated small wood chips |
Keep dry leaves or shredded cardboard in a weather-protected container near the bin so they are ready whenever you empty a kitchen scrap caddy. Most backyard composting frustrations begin when a household adds a week’s worth of wet food scraps and has no browns available to cover them.
The EPA suggests two to three parts browns by volume to one part greens as a helpful starting point. This volume rule isn’t the same as the technical carbon-to-nitrogen mass ratio, often discussed as roughly 30:1. Different materials contain different amounts of carbon and nitrogen, so use the volume rule as a practical beginning and adjust according to how the pile behaves.
Step 4: know what not to add
In a normal backyard composting pile, leave out meat, fish, bones, dairy, fats, greasy foods, cat and dog waste, contaminated or treated wood, glossy coatings and other plastics. Some materials attract animals or contain pathogens that an ordinary household pile may not reliably destroy.
Avoid adding diseased plant material or aggressive weeds with viable seeds unless you have a well-managed, validated hot process suitable for them. The theoretical ability of a pile to reach a hot center doesn’t guarantee that every bit of the material reaches sanitizing conditions. Herbicide-treated grass, pesticide-contaminated material and unknown waste should also be excluded.
“Compostable” packaging is not automatically appropriate for a home pile. Many certified products are designed for industrial composting conditions. Consult the material’s certification and your local program; when uncertain, keep it out of your home compost.
For a detailed list, use the EPA’s materials guide. It explains why some inputs are better left to municipal or commercial facilities.
Step 5: build the first pile in the right order
Start with a coarse bottom layer, such as short twigs or bulky browns, to help air move through the base. Then mix or layer greens with more plentiful browns. Chop large pieces before adding them, especially woody stalks, vegetable stems and whole leaves that mat together. Smaller pieces expose more surface area to microorganisms and tend to decompose faster.
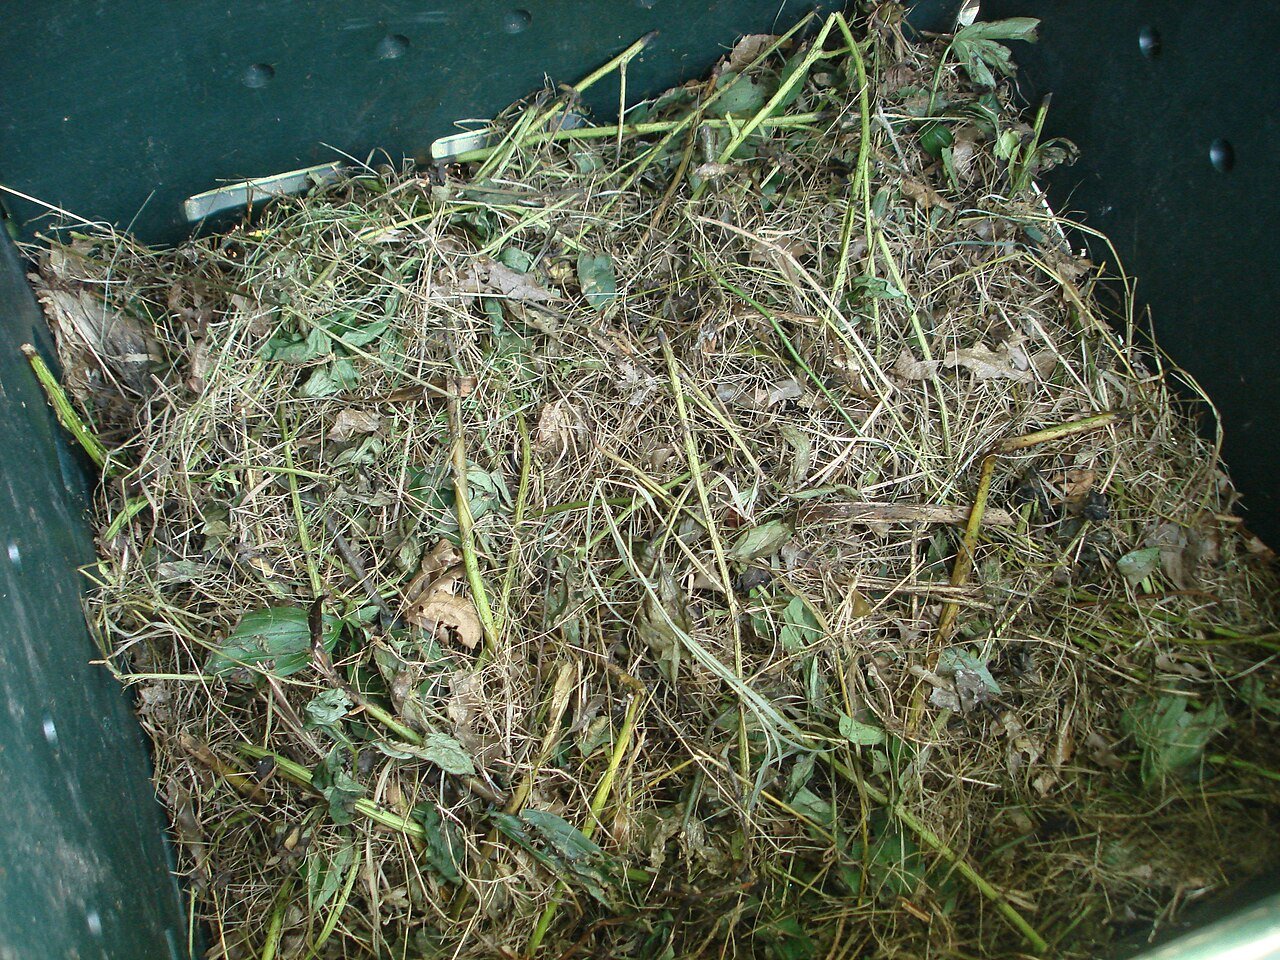
Each time you add fresh kitchen scraps, bury or cover them with dry brown material rather than leaving them exposed. The EPA recommends covering food scraps with several inches of browns. That single habit can reduce fruit flies, odors and animal interest.
Add water only as needed. The contents should feel like a wrung-out sponge: uniformly damp when squeezed, not dripping and not powder dry. A pile that looks wet at the bottom but dry at the top may need turning and a better mix rather than simply more water.
If the system has a lid, make sure it still allows the ventilation specified by the manufacturer or your design. A tightly sealed container without oxygen may produce smelly anaerobic decomposition instead of a healthy composting process.
Step 6: maintain oxygen, moisture and temperature
Microorganisms need oxygen to decompose material efficiently. Occasional turning pulls material from the outside to the center and introduces air. A fork or compost aerator can work in a simple bin; tumblers make the physical mixing easier for some gardeners. You don’t need to turn on an exact weekly schedule, but more frequent, careful turning can speed decomposition when other conditions are right.
Watch the composting process: Next Level Gardening demonstrates mixing greens and browns, aeration, moisture and the choices between a pile and a bin.
Video: How to Make Compost at Home (For Beginners), Next Level Gardening.
Moisture is just as important as oxygen. In dry weather, check the middle and add water in small amounts as you mix. In rainy weather, prevent water from collecting in the bottom and add coarse browns if the material becomes dense. Excess moisture blocks the air spaces that compost microbes need.
The center of an actively managed pile may heat to around 130–160°F in favorable conditions, according to the EPA. But many small home piles never become that hot, and cold composting is still a valid method. The trade-off is that decomposition is slower and pathogens or weed seeds may survive. Don’t assume a brief hot reading guarantees the whole pile has been sanitized.
If you enjoy measuring, use a long-stem compost thermometer. A rising temperature indicates microbial activity, but the goal is finished, stable compost—not reaching the highest possible number every day.
Step 7: use a two-bin or three-bin process if you have the space
A simple three-stage system makes the life cycle of compost easier to manage:
- Bin A — fresh material. Add new greens and browns, bury scraps and correct moisture.
- Bin B — active decomposition. Stop adding new food and turn this material periodically so it can break down more uniformly.
- Bin C — curing or finished compost. Let the material stabilize, remove recognizable debris and prepare it for garden use.
Once the first bin is full, transfer its contents to the second bin while beginning a new batch in the first. Material that is nearly ready moves into the curing area. The third compartment does not need to be enormous, but separating fresh and finished material reduces the risk of accidentally applying undecomposed scraps to seedlings.
You can adapt the same idea using two bins: one active and one curing. A tumbler can also operate in batches, provided you stop adding new scraps long enough for decomposition and curing. Continuous top-ups make it difficult to say when the entire container is finished.
Step 8: troubleshoot smells, flies and slow decomposition
| Symptom | Likely issue | What to do |
| Rotten or sour smell | Too wet, dense, oxygen-poor conditions | Mix thoroughly; add dry leaves or cardboard; improve drainage |
| Strong ammonia odor | Excess nitrogen-rich material | Add more browns and mix |
| Little visible decomposition | Too dry, too cold, too small or too many browns | Check moisture; add modest greens; turn and insulate as appropriate |
| Lots of fruit flies | Food scraps sitting uncovered | Bury scraps under several inches of browns |
| Rodent interest | Accessible scraps or unsuitable food | Remove attractants; use secure lid and small-gap base mesh |
| White fungal growth | Often a normal decomposer community | Check overall smell, moisture and progression before assuming a problem |
| Pile hot only in the middle | Common uneven heating | Turn material so the outside moves into the center |
| Slimy, compacted grass | Too many wet grass clippings at once | Mix in coarse dry browns to restore air spaces |
When pests appear, investigate the underlying problem instead of adding poison or household chemicals. Rodent-resistant design, appropriate inputs and covering scraps are safer and more durable than trying to mask odors with fragrances.
In a hot, dry region, the main difficulty may be moisture loss. In a wet climate, drainage and ventilation often require more attention. Composting advice should adapt to your actual weather, not just the month of the year.
Step 9: know when your compost is ready
Finished compost generally looks dark, loose and crumbly, smells earthy, and contains few recognizable original ingredients. After turning, it should no longer heat strongly from active decomposition. A curing period allows the material to stabilize further before it is used around young plants.
The EPA estimates that a well-maintained backyard pile can be ready in approximately three to five months, while an unattended pile may need a year or more. Its guidance also recommends curing compost for at least several weeks after active processing. Results depend heavily on season, material mix, particle size and management.
Screen the finished material if you want a fine texture for vegetable beds. Large sticks and unfinished chunks can return to the next pile. Remove any pieces of plastic or other foreign materials rather than allowing them into the soil.
Do not assume every pile is safe to use around seedlings just because it looks dark. Sour odors, continued heating or visible fresh food pieces are signs to wait longer. If a pile has received questionable inputs, use extra caution and seek regional guidance.
Step 10: apply finished compost to the garden
Compost can be used as a soil amendment or top-dressing. For new beds, the amount depends on existing soil organic matter and your intended crop. Overapplication—particularly with nutrient-rich materials—is possible, so a soil test is useful for established gardens.
The EPA home composting guide describes mixing a few inches into the upper soil layer as one possible approach, but this is not a universal prescription for every bed, soil or climate. Finished compost on top of the soil can also act as a surface amendment, helping conserve moisture and protect structure.
For more precise planning, enter your bed’s actual dimensions and desired application depth into GardenVoila’s compost calculator. If you’re filling a raised bed from scratch, use the raised bed soil calculator to estimate total volume, and treat compost as one component of the overall mix rather than the whole bed.
Indoor composting: the worm-bin alternative
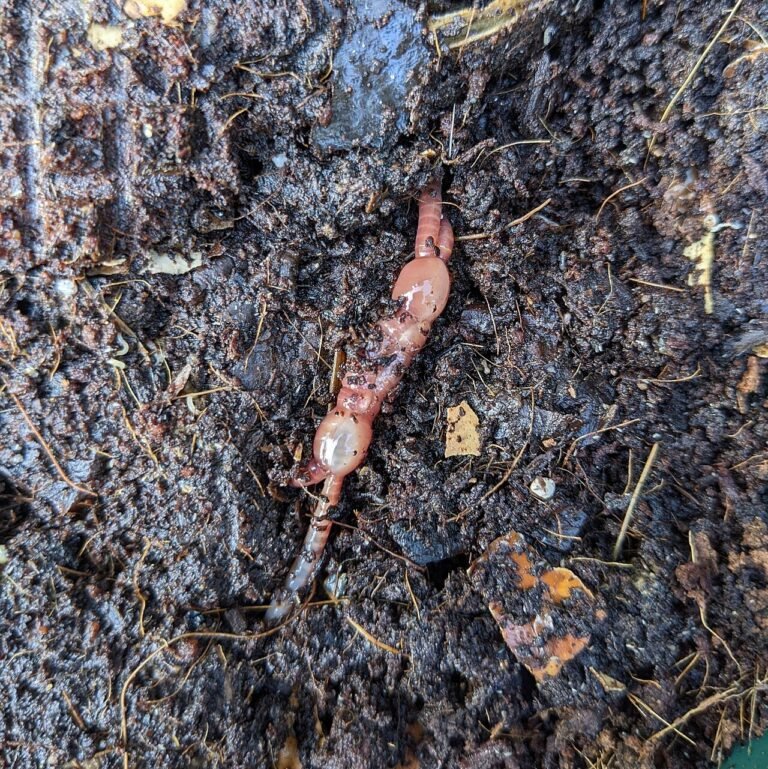
Not everyone has room for an outdoor pile. Worm composting, or vermicomposting, works indoors or in a sheltered location when managed correctly. A worm bin uses suitable species, commonly red wigglers, along with moist shredded-paper or leaf bedding and measured additions of food scraps.
Worms need an appropriate temperature range, oxygen and moist—but not saturated—bedding. Avoid feeding more scraps than the worms can process, and keep the bin sheltered from temperature extremes. The EPA’s worm-composting instructions describe setup, feeding, care and harvesting.
A worm bin is not exactly the same as a sealed bucket of scraps. Proper worms, bedding, ventilation, drainage and controlled feeding are critical. Finished vermicompost can enrich potting mixes or garden beds in moderate amounts, but avoid replacing all container media with worm castings.
If your apartment doesn’t permit composting, a local food-scrap collection or community composting initiative may be an easier way to keep organic waste out of the regular trash.
How much does it cost to set up a home composting system?
A basic open pile can use existing yard space and materials, with very little out-of-pocket cost. Wire-mesh and simple wood bins require some materials, but can be economical do-it-yourself options. Purchased enclosed bins and tumblers cost more and may be useful where tidiness, access or animal control matter.
Don’t choose a method purely by price. Consider how much material you generate, whether you can turn a pile, how easily you’ll harvest compost, and how much finished material your garden needs. An expensive tumbler with too little capacity may be less useful than a simple sturdy bin for a household with piles of autumn leaves.
For a complete backyard budget, the GardenVoila garden cost calculator can help organize costs for beds, soil and supplies; add your chosen bin cost as a separate project item in your plan.
A simple first-week composting checklist
Day one: Pick a method, identify a well-drained location and set up the bin. Gather a reserve of dry leaves or shredded cardboard.
Day two: Place coarse browns at the base, then add a balanced mixture of greens and browns. Moisten to a wrung-out-sponge feel.
During the week: Collect plant-based kitchen scraps in a lidded caddy. Each time you empty it, bury the scraps and cover with dry material. Keep meat, oils, pet waste and questionable packaging out.
End of the week: Check odor and moisture. If the pile is wet, add browns and mix. If bone dry, water gently. Make sure the lid and drainage are working.
Through the coming months: Continue monitoring, periodically aerate and keep fresh and curing material separate when possible. Only use finished compost when it is stable, earthy and well decomposed.
Free printable: the Year-Round Garden & Preserving Planner
Planting dates for 24 crops, monthly tasks, blanching times, canning safety numbers and a winter storage chart in one 8-page PDF. Enter your email to download it instantly and get our seasonal garden newsletter.
No spam. Unsubscribe any time. We never sell your email.
Frequently asked questions
How do I set up a home composting system cheaply?
Start with a simple outdoor pile or a wire-mesh bin and use free dry leaves and food scraps. The priority is drainage, airflow, suitable materials and access, not expensive equipment.
What is the right compost ratio?
The EPA recommends beginning with approximately two to three volumes of browns for every one volume of greens. Adjust if the pile becomes smelly, wet or inactive. Do not confuse this household volume rule with the chemical carbon-to-nitrogen ratio.
Can I put eggshells and coffee grounds in compost?
Yes. Coffee grounds are treated as greens in composting guidance, even though they look brown. Crushed eggshells can be added, although recognizable pieces may remain for a long time.
How long does a home compost pile take?
A well-managed pile may be ready in about three to five months, according to EPA guidance; a cold or unattended pile may take a year or longer. Temperature, moisture, inputs and turning all affect timing.
Does a home compost bin smell?
A healthy aerobic pile should smell earthy rather than rotten. Bad odors usually mean the mix is too wet, too rich in greens or lacking oxygen. Add browns, mix and correct drainage.
Can I compost indoors without worms?
There are specialized systems, but a sealed container of scraps is not automatically finished compost. Worm bins are a well-established indoor method, and food-scrap collection may be more practical where suitable indoor processing isn’t available.
Should I keep my compost bin in sunlight or shade?
Either can work if the pile receives appropriate moisture and oxygen. Choose an accessible, well-drained location. In hot weather, shade may reduce drying; in wet weather, cover and drainage may matter more.
Should I add soil or compost starter?
A healthy mixture of organic materials naturally contains decomposer organisms, so a purchased starter is generally unnecessary for a basic home pile. A small amount of finished compost may help inoculate a new batch, but moisture, oxygen and the material ratio are more important.
How do I know whether compost is safe for vegetables?
Use appropriate inputs, manage the process correctly and allow finished material to stabilize. Avoid contaminated materials, pet waste and diseased plants in normal home systems. When in doubt, consult local Extension or public-health guidance.
Choose a compost bin and troubleshoot insects
Once you understand the composting process, compare outdoor compost bins, tumblers and multi-bay systems for the setup that matches your available space and waste. If larvae appear in a wet or food-heavy pile, our guide to maggots and black soldier fly larvae in compost explains what is normal and how to correct moisture or food exposure before using the finished compost.
For gardeners considering animal or commercial growing-media amendments, compare horse manure compost and its source risks with mushroom compost and its salt content. Both need verification before substantial use, especially around vegetables.
A different approach is worm-bin composting with red wigglers, which is separate from hot composting; see also coir versus peat moss when choosing container growing media. These materials perform different roles and should not be treated as interchangeable.
Final takeaway
To start composting at home, you don’t need complicated equipment. Choose a practical bin, stockpile browns, add appropriate kitchen greens, maintain moisture and oxygen, and give the process enough time. A simple system used consistently will deliver more value than a sophisticated composter that is hard to maintain. When the first finished batch is ready, calculate how much your garden can use with the GardenVoila compost calculator.
Research and further reading
- U.S. Environmental Protection Agency — Composting at Home: materials, methods, ratios, safety and timescales.
- U.S. EPA — Approaches to Composting: why carbon, nitrogen, water and oxygen matter.
- U.S. EPA — Composting Overview: systems and decomposition principles.
- U.S. EPA — Backyard Composting Guide (PDF): introductory home-composting instructions.