Pressure canning is the only safe home method for low-acid foods: plain vegetables such as green beans, corn, carrots, potatoes, peas and beets, as well as dried beans, meat, poultry, fish, stocks and soups. A pressure canner traps steam to reach 240°F, the temperature needed to destroy Clostridium botulinum spores, which survive boiling water. To pressure can safely, use a tested USDA or extension recipe, vent the canner with a steady stream of steam for 10 minutes before pressurizing, process at the correct pounds of pressure for your altitude and gauge type for the full time, then let the canner depressurize naturally before opening. A dial gauge should be tested for accuracy every year.
Pressure canning at a glance
| Item | Guidance |
|---|---|
| Required for | Low-acid foods (pH above 4.6): vegetables, beans, meat, poultry, seafood, soups, stocks |
| Target temperature | 240°F inside the canner |
| Venting | 10 minutes of steady steam before closing the vent |
| Weighted gauge pressure | 10 psi at 0 to 1,000 feet; 15 psi above 1,000 feet |
| Dial gauge pressure | 11 psi at 0 to 2,000 feet, rising 1 psi per 2,000 feet (see table) |
| Headspace | Usually 1 inch for vegetables; follow the recipe |
| Cooling | Let pressure drop to zero naturally; never force-cool |
| Gauge testing | Have dial gauges tested yearly |
| Not suitable | Most electric multicookers and pressure cookers smaller than a canner |
Why do low-acid foods need a pressure canner?
Clostridium botulinum spores are found in soil and can be on any vegetable, no matter how carefully washed. In low-acid foods sealed in jars, with no oxygen, these spores can germinate at room temperature and produce botulinum toxin, one of the most potent toxins known, often without changing the food’s look or smell. Boiling water at 212°F does not reliably destroy the spores. A pressure canner raises the boiling point of water to 240°F at 10 to 15 pounds of pressure, and holding that temperature for the tested time destroys them. The University of New Hampshire Extension fact sheet on canning vegetables in a pressure canner stresses that there are no safe shortcuts: water bath canning, oven canning and steam canning are not substitutes for low-acid foods.

What kind of pressure canner do you need?
- A true pressure canner, large enough to hold at least four quart jars standing upright on a rack. Smaller pressure cookers heat and cool too quickly, so tested processing times do not apply.
- Dial gauge canners show the exact pressure on a dial and need annual accuracy testing, often available free or at low cost through county extension offices.
- Weighted gauge canners use a weight that rocks or jiggles to maintain pressure at 5, 10 or 15 psi; they do not need testing but only allow those pressure settings.
- Electric multicookers such as Instant Pot-style appliances have not been shown to reach and hold the required temperature reliably, and the USDA does not recommend them for pressure canning, even if they have a “canning” button. A few dedicated electric pressure canners exist; use them only according to their manufacturer’s tested instructions.
Check the gasket, vent pipe and safety valve before each season, and replace worn gaskets.
What pressure should you use for your altitude?
| Altitude | Dial gauge (psi) | Weighted gauge (psi) |
|---|---|---|
| 0 to 1,000 feet | 11 | 10 |
| 1,001 to 2,000 feet | 11 | 15 |
| 2,001 to 4,000 feet | 12 | 15 |
| 4,001 to 6,000 feet | 13 | 15 |
| 6,001 to 8,000 feet | 14 | 15 |
| 8,001 to 10,000 feet | 15 | 15 |
These are the pressures most USDA vegetable recipes use; a few foods have different requirements, so always follow the specific recipe. Processing times do not change with altitude in pressure canning; the pressure does.
How do you pressure can, step by step?
- Choose a tested recipe and prepare jars, new lids and bands. Keep jars hot.
- Prepare the food exactly as directed (hot pack or raw pack), cutting pieces to the specified size.
- Add water to the canner, usually 2 to 3 inches, or the amount the manufacturer specifies, and place the rack in the bottom. Heat the water.
- Fill the jars, leaving the required headspace (usually 1 inch), remove air bubbles, wipe rims and apply lids and bands fingertip-tight.
- Load the canner with jars upright on the rack.
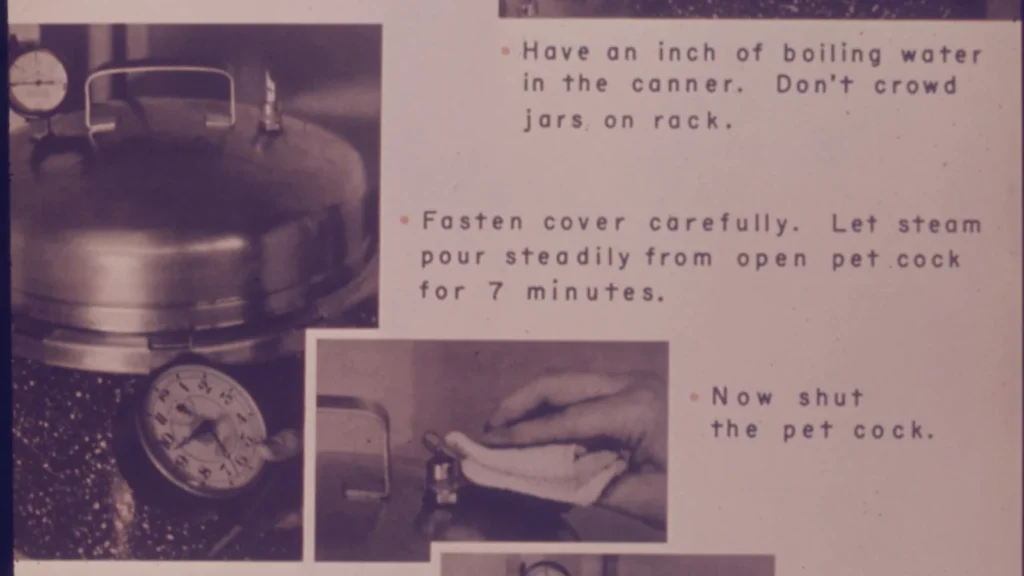
- Fasten the lid securely, leaving the vent pipe open (weight off, or petcock open).
- Heat on high until steam flows steadily from the vent, then vent for a full 10 minutes. Venting removes air, which would otherwise lower the temperature at a given pressure.
- Close the vent by placing the weight or closing the petcock. Let pressure build to the correct level for your altitude.
- Start the timer only when the correct pressure is reached. Adjust the heat to hold steady pressure. If pressure drops below the target at any point, bring it back up and restart the full processing time.
- When time is up, turn off the heat and let the canner cool naturally until the pressure returns to zero. Do not move the canner, open the vent, or run water over it.
- Wait about 10 minutes after the pressure reaches zero, remove the weight or open the petcock, then unfasten the lid, tilting it away from you so steam escapes away from your face.
- Remove the jars with a jar lifter and cool them upright on a towel for 12 to 24 hours.
- Check seals, remove bands, label, and store in a cool, dark place.

Food and equipment safety: Botulism from improperly canned low-acid foods can be fatal. Use only tested recipes from the USDA, the National Center for Home Food Preservation or extension services, and never shorten times or lower pressure. Read your canner’s manual, inspect the gasket and safety valve before use, never leave a pressurized canner unattended, never open it under pressure, and keep children and pets away. Seek emergency medical care for symptoms such as double vision, drooping eyelids, slurred speech, trouble swallowing or breathing, or muscle weakness.
Sample processing times for common vegetables
The following are examples of USDA processing times at the pressures shown in the altitude table. They are for orientation only; always follow the complete tested recipe for preparation, pack style and headspace.
| Vegetable | Pints | Quarts |
|---|---|---|
| Green beans (hot or raw pack) | 20 minutes | 25 minutes |
| Carrots, sliced or diced | 25 minutes | 30 minutes |
| Corn, whole kernel | 55 minutes | 85 minutes |
| Beets | 30 minutes | 35 minutes |
| Potatoes, white, cubed or whole | 35 minutes | 40 minutes |
| Peas, green shelled | 40 minutes | 40 minutes |
For a broader list, see the Colorado State University Extension guide to canning vegetables, which includes preparation directions and altitude adjustments. The USDA Complete Guide to Home Canning contains the full set of tested times for vegetables, meats and soups.
Which foods should never be home canned?
Some foods have no tested safe home canning process because heat does not penetrate them reliably or they are too dense:
- Pureed or mashed pumpkin, winter squash and other dense purees (cubes can be pressure canned).
- Refried beans, mashed potatoes and thick pastes.
- Dairy products, eggs, butter and cream-based soups.
- Flour, cornstarch, rice, pasta or noodles added to soups (add them when serving).
- Broccoli, cauliflower, Brussels sprouts and cabbage, which become strongly flavored and discolored (pickle or freeze them instead).
- Lettuce and other leafy salad greens.
For these, freezing is usually the best option; see how to freeze vegetables.
Can you pressure can soups and stocks?
Yes, but only following tested guidance. Combine vegetables, meat and broth, but leave out pasta, rice, flour, cream, milk and other thickeners. Cook the soup briefly, fill jars halfway with solids, then top with broth, leaving 1 inch of headspace. Process for the time required by the ingredient needing the longest time; for example, soups containing seafood or dried beans need longer than vegetables alone. Clear meat and poultry stocks have their own tested recipes.
How do you know if pressure-canned food is safe?
Before opening, check for bulging or unsealed lids, leaking, spurting liquid, foam, mold, cloudy liquid, unnatural color or off odors. Discard any jar showing these signs without tasting, handling it carefully: place it in a sealed bag and dispose of it in the trash, and wash any surfaces it touched with a bleach solution. Some experts also recommend boiling home-canned low-acid foods for 10 minutes before eating as an added precaution, adding 1 minute per 1,000 feet of altitude, when there is any doubt about the processing.
What are the most common pressure canning mistakes?
- Skipping the 10-minute venting step, which leaves air inside and lowers the temperature.
- Using an untested dial gauge that reads incorrectly.
- Ignoring altitude, especially with weighted gauge canners above 1,000 feet.
- Starting the timer too early, or not restarting it after pressure drops.
- Force-cooling the canner by opening the vent or running water over it, which causes siphoning and seal failures and is unsafe.
- Using an electric multicooker or a small pressure cooker.
- Packing jars too tightly or using larger pieces than the recipe calls for, which slows heat penetration.
- Using recipes from unverified sources, including “grandma’s methods” for water bath canning beans.
Planning a garden for pressure canning
If you plan to can, grow crops in quantity and choose varieties suited to processing: pole or bush snap beans, sweet corn, carrots, beets and potatoes all can well. Our guides to bush beans, pole beans, sweet corn and carrots cover planting and harvest timing, and the plants needed for a harvest goal calculator estimates how much to plant for the jars you want. For high-acid foods, see water bath canning for beginners.
Preserving more of your harvest? Our food preserving guide helps you choose the right method for each crop.
Free printable: the Year-Round Garden & Preserving Planner
Planting dates for 24 crops, monthly tasks, blanching times, canning safety numbers and a winter storage chart in one 8-page PDF. Enter your email to download it instantly and get our seasonal garden newsletter.
No spam. Unsubscribe any time. We never sell your email.
Pressure canning FAQ
Can I use an Instant Pot to pressure can?
No. Electric multicookers have not been shown to reach and hold safe canning temperatures.
Do I need to adjust pressure canning time for altitude?
No, you adjust the pressure, not the time.
How often should I test my dial gauge?
Every year before canning season, and after dropping the canner.
Can I water bath can green beans for 3 hours instead?
No. Long boiling does not reliably destroy botulinum spores.
Why did my jars lose liquid in the pressure canner?
Usually from fluctuating pressure or opening the canner too soon; sealed jars are still safe.
Can I stack jars in a pressure canner?
Yes, pints can be stacked with a second rack between layers if the canner is tall enough.
Hot pack or raw pack: which should you use?
Many vegetable recipes give two options. In a raw pack, fresh, uncooked vegetables are packed tightly into jars and covered with boiling water. Raw packing is quicker, but vegetables shrink during processing, leaving more air in the jar and sometimes floating food. In a hot pack, vegetables are boiled briefly before packing and covered with the hot cooking liquid. Hot packing removes air from the plant tissue, shrinks food before it goes into the jar so more fits, improves color and flavor retention, and reduces floating. Both methods are safe when you follow the tested recipe for that pack style; the processing time may differ between them, so do not mix instructions from different pack styles.
Should you add salt to canned vegetables?
Salt is optional in pressure-canned vegetables. It adds flavor but plays no role in safety at the amounts used, typically 1/2 teaspoon per pint or 1 teaspoon per quart. You can leave it out entirely or season the vegetables when you heat them to serve. Use canning or pickling salt, which has no anti-caking agents that can cloud the liquid; table salt is safe but may leave sediment.
How do you prepare for a canning day?
- Pick produce at peak quality, ideally the morning of canning. Canning does not improve poor-quality vegetables.
- Read the recipe and canner manual before you start, and check that you have enough jars, new lids and bands.
- Test the dial gauge before the season and inspect the gasket and vent.
- Prepare a clear workspace with towels for cooling jars, a jar lifter, funnel, headspace tool and timer.
- Plan the time: including heating, venting and cooling, one canner load can take two to three hours.
- Keep records: label jars with the contents and date, and note the batch, pressure and time in a canning notebook.
What about steam canners?
Atmospheric steam canners, which use a small amount of boiling water to surround jars with steam, have been tested and can be used for some high-acid foods, following the same processing times as water bath recipes up to 45 minutes. They are not pressure canners and must never be used for low-acid vegetables, meat or soups. Pressure canners use steam under pressure; atmospheric steam canners do not.
References used in this guide: University of New Hampshire Extension, Canning Vegetables in a Pressure Canner; Colorado State University Extension, Canning Vegetables; National Center for Home Food Preservation, USDA Complete Guide to Home Canning.